HerokuでNode.jsアプリケーションを公開する#
Herokuとは、アプリケーションをクラウド上に公開してくれるサービスです。 Herokuを使って世の中に公開してみましょう。
前提#
こちらの手順でWebアプリケーションを作成しておいてください。 もしくは、Nodeで動作するWebアプリケーションを用意してください。
Gitコマンドがインストールされていること。 Herokuのアカウントを作成し、Herokuのコマンドをインストールしておいてください。
アプリを実行できる状態にする。#
- HerokuでNode.jsのアプリケーションを公開するためには、
- npm run postinstall でビルドができること(必須ではない。)
- npm start で実行できること。 環境変数 PORT に設定されたポート番号でアプリケーションが起動可能なこと。 が必要です。
設定していきます。
package.jsonで "scripts": { の次の行をの場所を探して、4行追加します。
"scripts": { //この行の後に下の4行を追加します。
    "start": "node dist/index.js",
    "build": "run-s build:*",
    "build:backend": "tsc",
    "build:front": "webpack --config webpack.front.config.js --mode production",
// 省略
また、src/backend/index.tx を編集し、起動ポートを可変にします。 下の方の行を2行追加。2行変更します。
import express from 'express'
import messageController from './controllers/message'
import enqueteController from './controllers/enquete'
import {createConnection} from 'typeorm'

import Enquete from './models/Enquete'

const app: express.Express = express()

app.use(express.json())
app.use(express.urlencoded({ extended: true }))

app.use("/messages", messageController)
app.use("/api/enquetes", enqueteController)
app.use("/", express.static(__dirname + "/public"))

!async function initialize(){
    await createConnection({
        type: "postgres",
        url: process.env.DATABASE_URL || "postgres://postgres:postgres@localhost:5432/postgres",
        synchronize: true,
        entities: [
            Enquete,
        ],
        extra: {
            ssl: (!!process.env.DATABASE_SSL) ? {
                rejectUnauthorized: false,
            } : false,
        }
    });
    // 3000番ポートでAPIサーバ起動
    const port = process.env.PORT || 3000; //この行を追加
    app.listen(port, () => { // この行を変更 3000 を port に変更
        //console.log('ポート3000番で起動しましたよ!') // この行を変更 コメントアウト
        console.log("ポート" + port + "番で起動しました!") // この行を追加
    })
}()
これでHerokuでアプリケーションを公開する準備ができました。 いよいよ、Herokuにのせていきます。
Herokuにアプリケーションを公開する。#
Herokuにはgitというコマンドを使ってファイルをアップロードします。 ターミナルで、nodeアプリののディレクトリで以下のコマンドを実行してください。
git init; git add --all && git commit -m "first commit"
このコマンドで、ファイルをgit管理にしています。
次にHerokuにアプリケーションをアップロードします。 まずはターミナルでHerokuにログインするために、以下のコマンドを実行します。
heroku login
Herokuで作ったアカウントのメールアドレスとパスワードを求められるので入力してください。 続けて、アプリケーションを作成します。
heroku create
次にアプリケーションにPostgresを追加します。
heroku addons:create heroku-postgresql:hobby-dev
Created postgresql-dimensional-xxxxx as DATABASE_URL と表示されるので、"postgresql-dimensional-xxxxx"の部分(xxxxxは多分数字)をコピーしておいてください。
次に、HerokuアプリにDBのSSL設定を行います。
heroku config:set DATABASE_SSL=true
=の後ろは先ほどコピーした文字列です。
これでファイルをアップロードできるようになりました。gitコマンドでファイルをアップロードします。
git push heroku master
たくさんの出力がしばらくされます。 最後の方に
remote:        Released v11
remote:        https://stormy-plains-43443.herokuapp.com/ deployed to Heroku
remote:
remote: Verifying deploy... done.
To https://git.heroku.com/stormy-plains-43443.git
   18188d3..a393972  master -> master
と出力されます。httpsから始まり、/で終わる文字(↑の例だと2行目の https://stormy-plains-43443.herokuapp.com/ )
このURLをブラウザで表示すると、アンケートが入力できます。
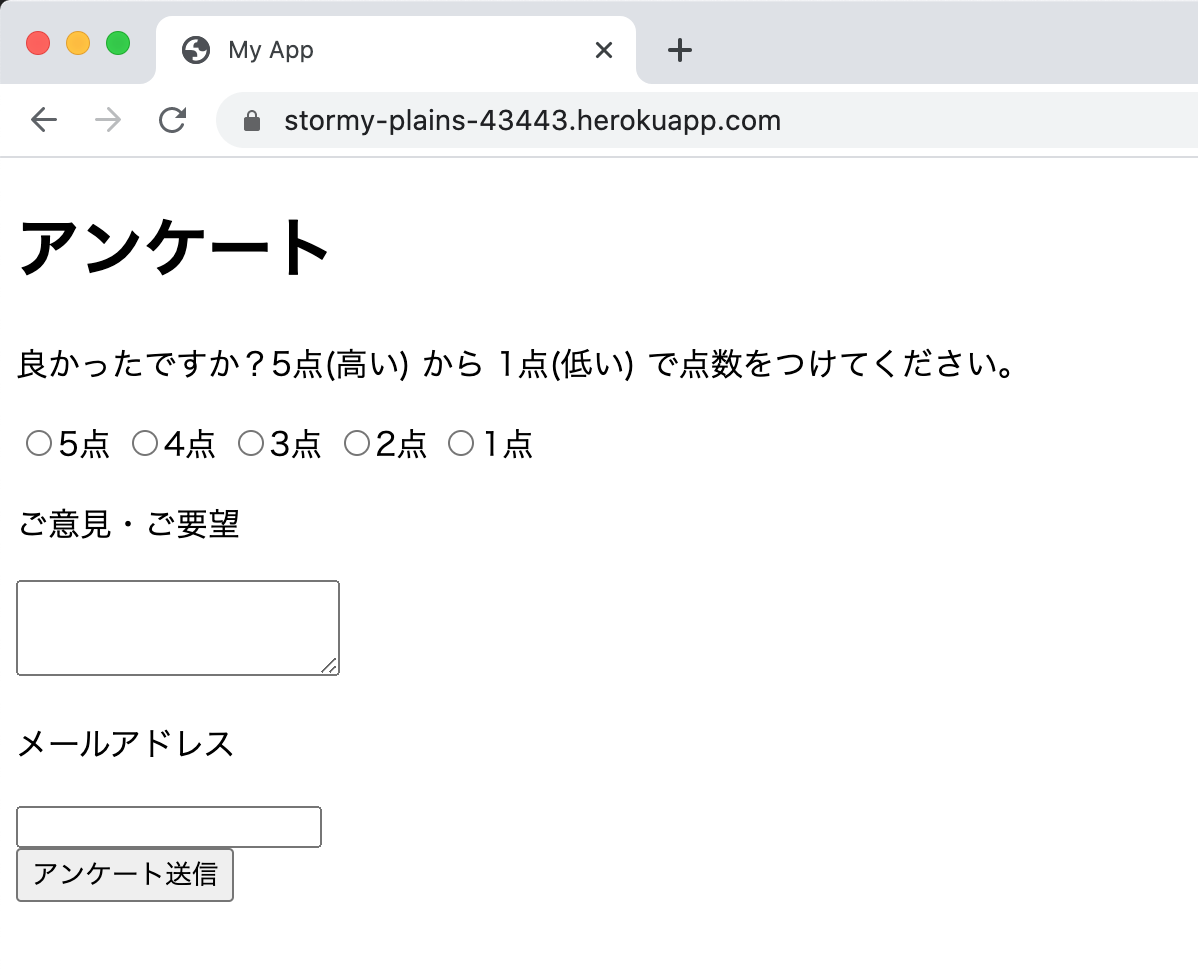
これでアンケートサイトをインターネットに公開することができました!